Buzzer Tutorial with Arduino and Rhinobot
Introduction
A buzzer is an electronic component that produces sound when an electric current is applied. It is widely used in alarms, notifications, and various electronic projects. In this tutorial, we will learn how to connect a buzzer to an Arduino Nano, locate it on the Rhinobot controller board, and write code to control it. Additionally, we will explore how to use a button to activate the buzzer.
Understanding a Buzzer
There are two types of buzzers:
- Active Buzzer: Generates sound when powered; does not require frequency control.
Passive Buzzer: Requires a signal with a specific frequency to produce sound.
For this tutorial, we will use an active buzzer, which can be turned on or off using digital signals.

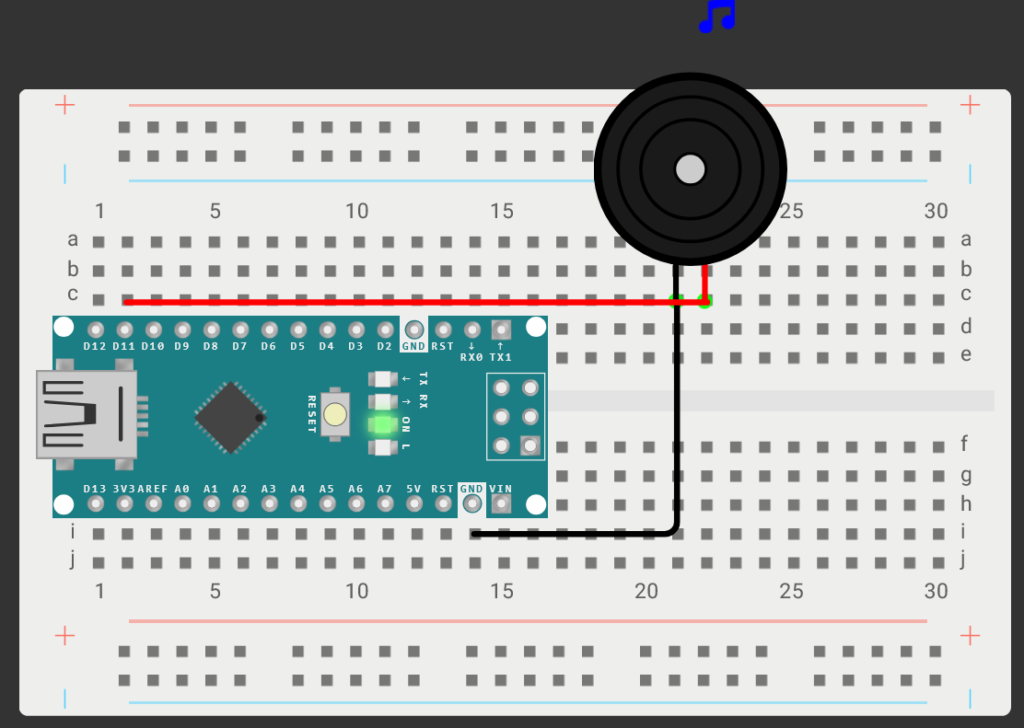
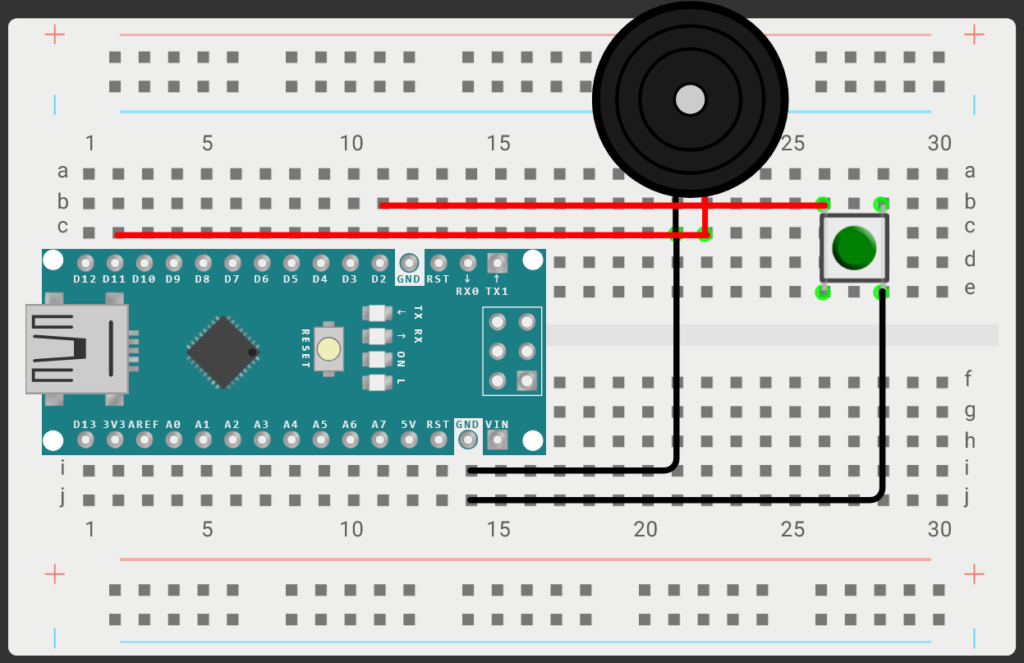
Connecting a Buzzer to Arduino Uno
To connect a buzzer to an Arduino Uno, follow these steps:
- Connect the positive (+) pin of the buzzer to digital pin 11 on the Arduino.
Connect the negative (-) pin of the buzzer to the GND pin of the Arduino.
This simple circuit allows the Arduino to control the buzzer using digital signals.

Locating the Buzzer on the Rhinobot Controller Board
The Rhinobot controller board makes it easier to learn Buzzer controls. All the connections have already been done on the board, and all you have to do is learn how to code, making it relatively easier for beginners.
The Buzzer is connected to pin 11 on the controller board, and we can complete the circuit by connecting a jumper cap to the BZR pins.

Arduino Code for Activating the Buzzer
The following code will turn the Buzzer on:
void setup() {
// put your setup code here, to run once:
pinMode(11, OUTPUT);
}
void loop() {
// put your main code here, to run repeatedly:
digitalWrite(11, HIGH);
}
- void setup() – Code written inside setup() function runs once.
- pinMode(11, OUTPUT) – Sets digital pin 11 as OUTPUT to send signals (e.g. to a Buzzer).
- void loop() – Code written inside loop() function runs indefinetly.
- digitalWrite(11, HIGH) – sets digital pin 11 to HIGH, turning it ON (5V) to power a connected device like an Buzzer.
Arduino Code for Controlling Buzzer using Button
The following code will turn the Buzzer on whenever the Button is pressed:

// Define pins
#define BUZZER_PIN 11
#define BUTTON_PIN 2
void setup() {
pinMode(BUZZER_PIN, OUTPUT); // Set buzzer as output
pinMode(BUTTON_PIN, INPUT_PULLUP); // Set button as input with pull-up resistor
}
void loop() {
int buttonState = digitalRead(BUTTON_PIN); // Read button state
if (buttonState == LOW) {
digitalWrite(BUZZER_PIN, HIGH); // Turn buzzer ON
} else {
digitalWrite(BUZZER_PIN, LOW); // Turn buzzer OFF
}
}
- pinMode(BUTTON_PIN, INPUT_PULLUP);: Configures the button pin as an input with an internal pull-up resistor.
- digitalRead(BUTTON_PIN);: Reads the state of the button.
- If condition (if (buttonState == LOW)):
- When the button is pressed, the buzzer turns on.
When released, the buzzer turns off.
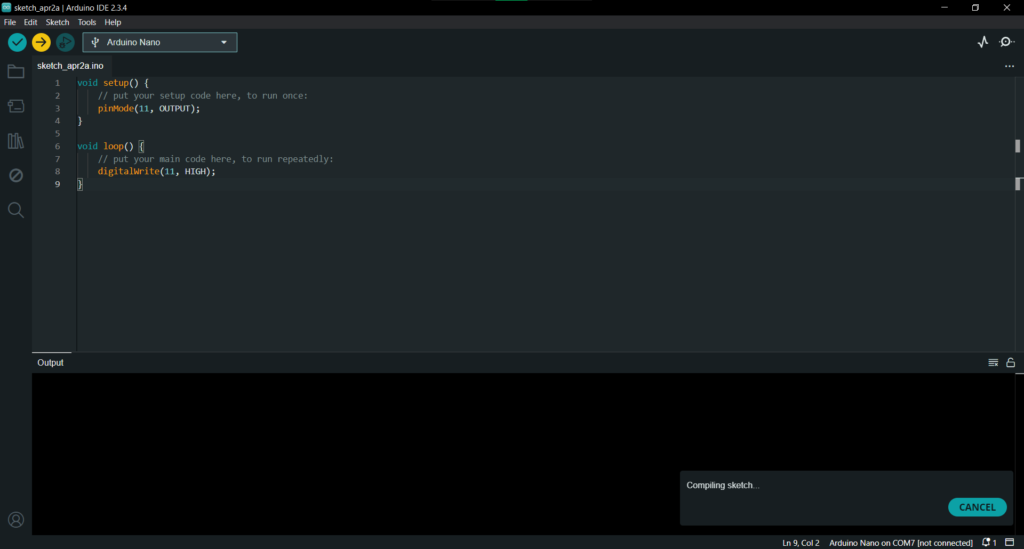
Uploading the Code to Arduino
- Open the Arduino IDE:

- Connect your Arduino Nano to your computer via USB.Select the correct board: Tools > Board > Arduino Nano.

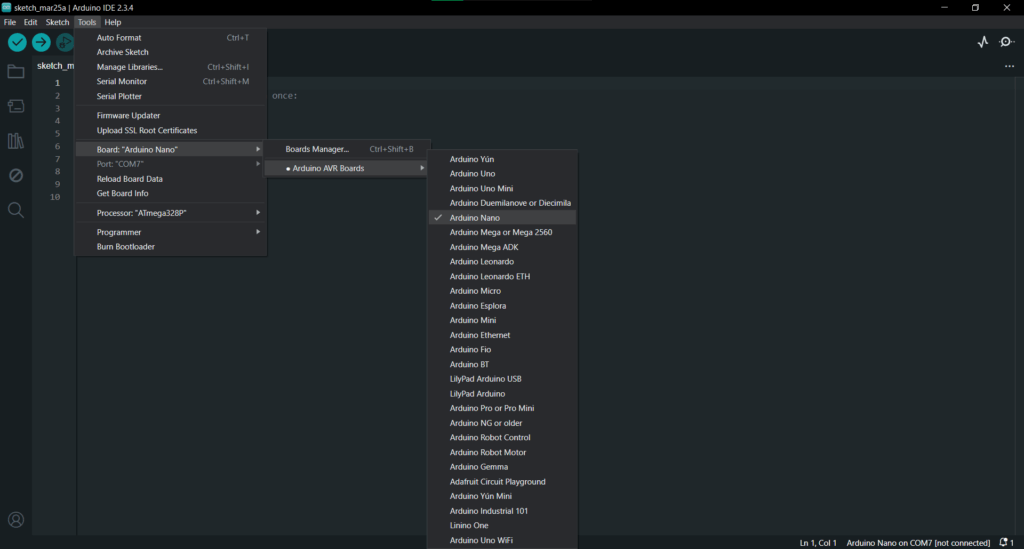
- Select the correct port: Tools > Port > (your Arduino port).

- Copy and paste the above code into the Arduino IDE.

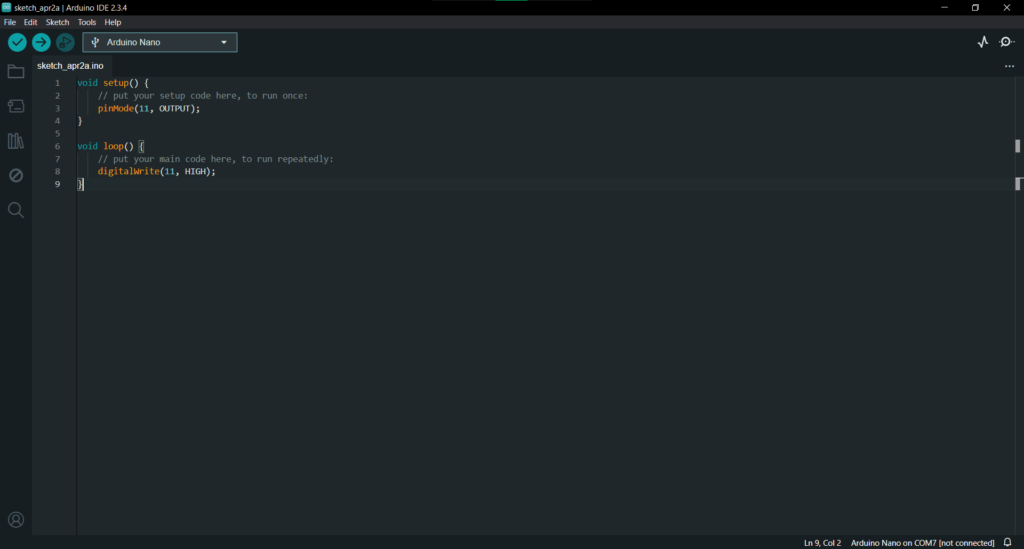
- Click on the Upload button or alternatively press Ctrl + U.

- Once uploaded, the Buzzer should start.

Conclusion
In this tutorial, we learned how to connect and control a buzzer with Arduino. We also explored how to activate the buzzer using a button. These concepts are fundamental in building alarm systems, user feedback mechanisms, and other interactive projects.
Experiment further by modifying the tone or using a passive buzzer to generate different sounds.